PART 6 - OTHER CONTROL COMMANDS
1. Armed / Disarm a device.
Example Armed Command:
https://192.168.0.11:17000/v1/method/hub.device.armed.set?_id=5f4e588c120bab1069c13c4f&armed_bool=true
Curl with no auth:
curl --insecure --http1.1 “https://192.168.0.11:17000/v1/method/hub.device.armed.set?_id=5f4e588c120bab1069c13c4f&armed_bool=true”
Example Disarmed Command:
https://192.168.0.11:17000/v1/method/hub.device.armed.set?_id=5f4e588c120bab1069c13c4f&armed_bool=false
Curl with no auth:
curl --insecure --http1.1 “https://192.168.0.11:17000/v1/method/hub.device.armed.set?_id=5f4e588c120bab1069c13c4f&armed_bool=false”
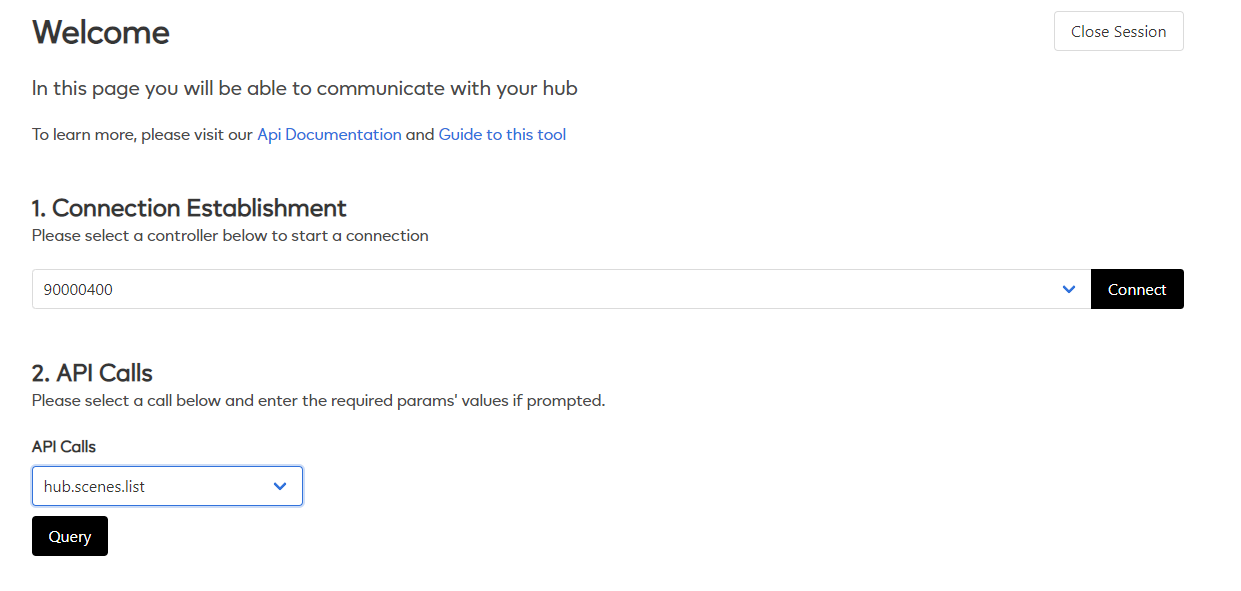
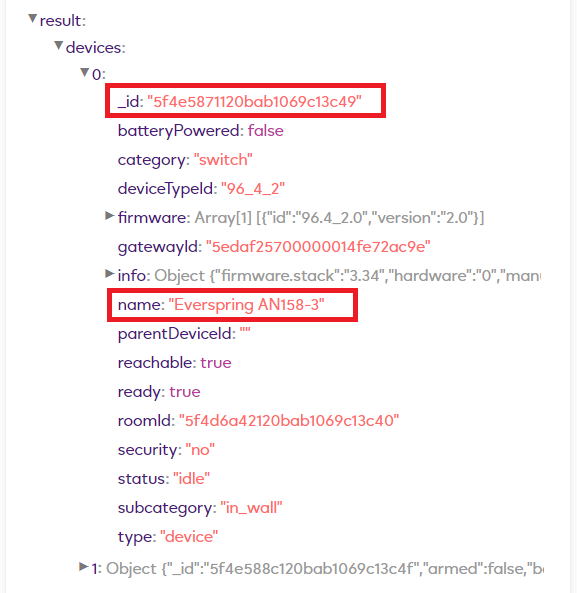
The easiest way to discover the correct deviceid _id number is to use the online API tool and watch the “Broadcast response - Hub’s latest broadcast messages” section.
Go to Ezlo API Tool and login with your Vera username and password.
Select your Ezlo Hub’s Serial number and click the Connect button.
In the Vera Mobile app press the “Armed” button on the device you want to construct a HTTPS command for.
Watch the Broadcast section for the response.
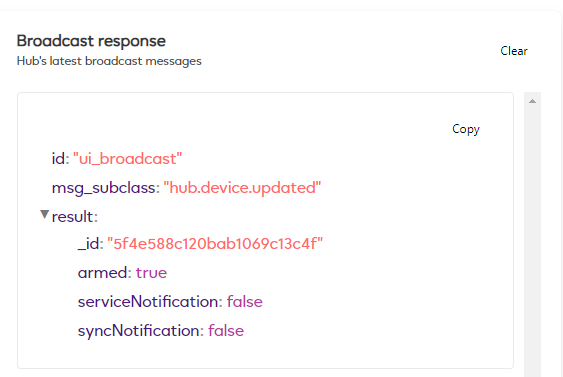
You will see a response like the above screen shot. Copy the _id number this is the one to use in your HTTPS command.
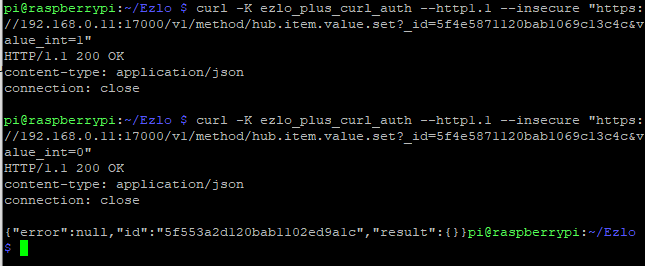
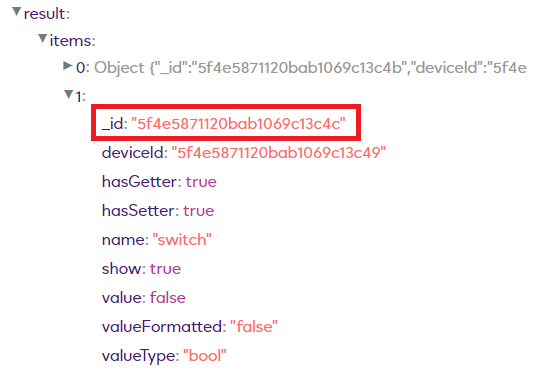
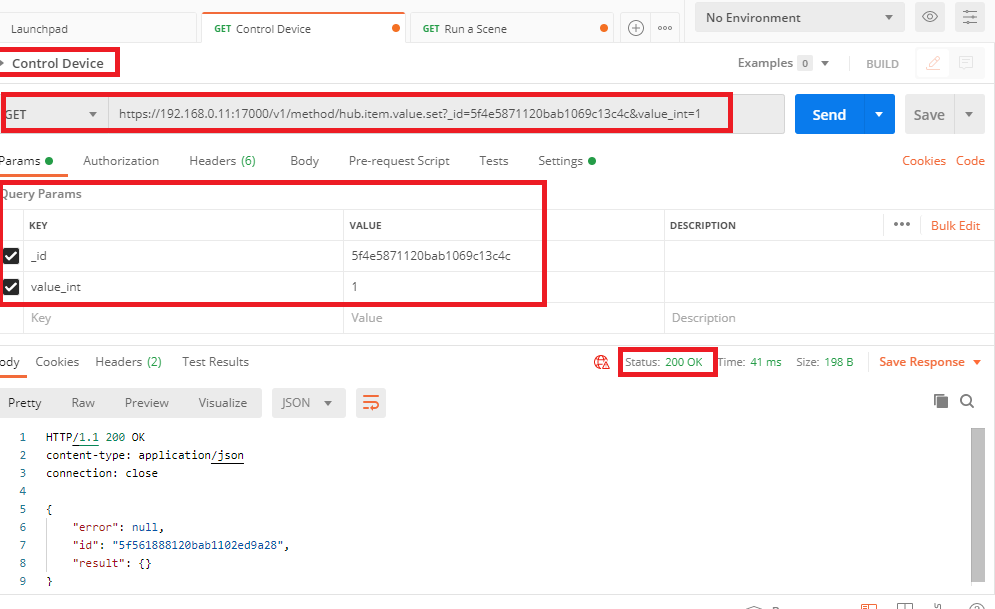
2. Turn ON / OFF a Switch. (This is a virtual switch on my Ezlo Plus)
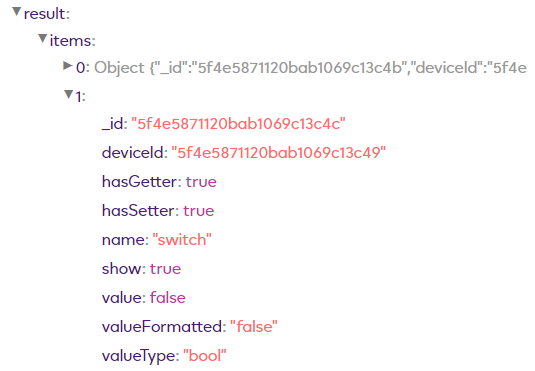
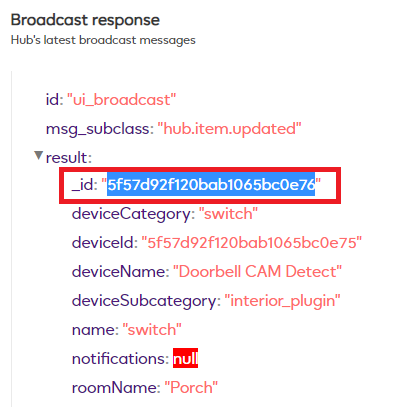
Again the easiest way to discover the correct deviceid _id number is to use the online API tool and watch the “Broadcast response - Hub’s latest broadcast messages” section.
Turn on the switch you want to control via the HTTP API and look for its item object _id number. In this example its “5f57d92f120bab1065bc0e76”
Command with no auth to turn on the switch:
https://192.168.0.11:17000/v1/method/hub.item.value.set?_id=5f57d92f120bab1065bc0e76&value_bool=true
OR
https://192.168.0.11:17000/v1/method/hub.item.value.set?_id=5f57d92f120bab1065bc0e76&value_int=1
Command with no auth to turn off the switch:
https://192.168.0.11:17000/v1/method/hub.item.value.set?_id=5f57d92f120bab1065bc0e76&value_bool=false
OR
https://192.168.0.11:17000/v1/method/hub.item.value.set?_id=5f57d92f120bab1065bc0e76&value_int=0
3. Trip and Un-trip a motion sensor. (This is a virtual motion sensor on my Ezlo Plus)
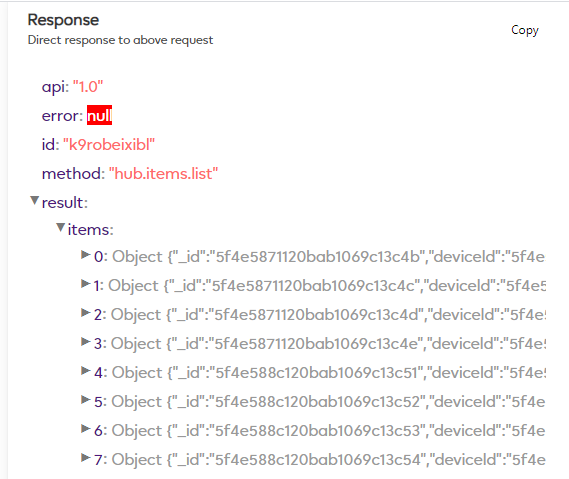
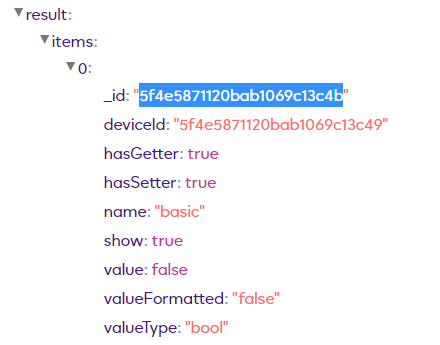
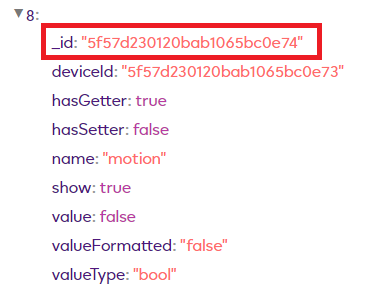
To find the correct item object _id number for this motion sensor I had to use the “hub.items.list” query in the online API tool, in this example its “5f57d230120bab1065bc0e74”
Command with no auth to trip the motion sensor:
https://192.168.0.11:17000/v1/method/hub.item.value.set?_id=5f57d230120bab1065bc0e74&value_bool=true
OR
https://192.168.0.11:17000/v1/method/hub.item.value.set?_id=5f57d230120bab1065bc0e74&value_int=1
Command with no auth to un-trip the motion sensor:
https://192.168.0.11:17000/v1/method/hub.item.value.set?_id=5f57d230120bab1065bc0e74&value_bool=false
OR
https://192.168.0.11:17000/v1/method/hub.item.value.set?_id=5f57d230120bab1065bc0e74&value_int=0
The eagle eyed are probably noticing by now that the commands are the same for the switch and motion sensor, we are just changing the devices item object _id number to the device we want to control !
4. Controlling Ezlo House Modes (Home / Night / Away / Vacation).
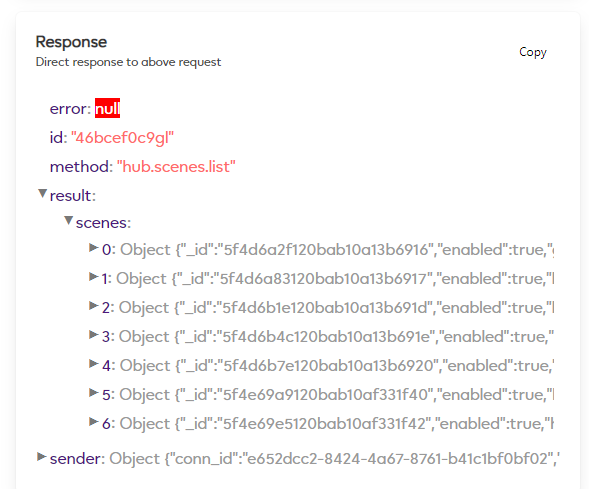
Using the online API Tool we can use the “hub.modes.get” query to list our house modes and see their ID numbers.
Looking in the “Response” section and the “Result” we can see the first House Mode item object:
Home = _id “1”

Away = _id “2”
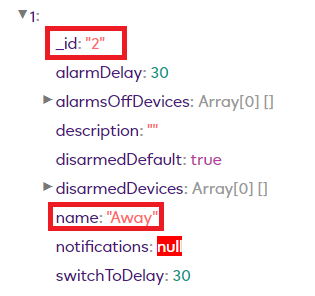
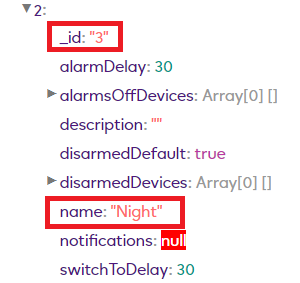
Night = _id “3”
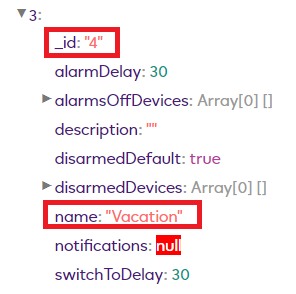
Vacation = _id “4”
OK so now we know the _id numbers for each of the different House Modes, lets look at switching the modes via HTTPS commands, for this we can use “hub.modes.switch”.
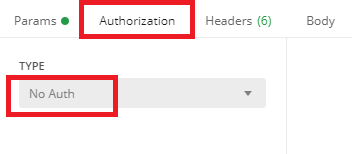
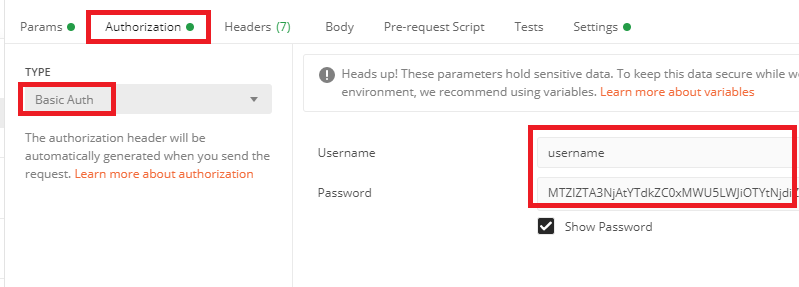
NOTE: This only works when using the token authentication:
EDIT: Seems you can switch House Modes with no authentication, I rebooted my Ezlo Plus and then it started working with no auth.
Curl HTTPS command using Auth - HOME MODE
curl -K ezlo_plus_curl_auth --http1.1 --insecure https://192.168.0.11:17000/v1/method/hub/modes/switch?modeId=1
Curl HTTPS command using Auth - AWAY MODE
curl -K ezlo_plus_curl_auth --http1.1 --insecure https://192.168.0.11:17000/v1/method/hub/modes/switch?modeId=2
Curl HTTPS command using Auth - NIGHT MODE
curl -K ezlo_plus_curl_auth --http1.1 --insecure https://192.168.0.11:17000/v1/method/hub/modes/switch?modeId=3
Curl HTTPS command using Auth - VACATION MODE
curl -K ezlo_plus_curl_auth --http1.1 --insecure https://192.168.0.11:17000/v1/method/hub/modes/switch?modeId=4
Curl HTTPS command using Auth - CANCEL HOUSE MODE SWITCHING
Using this command you can cancel the switching to another house mode.
curl -K ezlo_plus_curl_auth --http1.1 --insecure https://192.168.0.11:17000/v1/method/hub/modes/cancel_switch?modeId=1
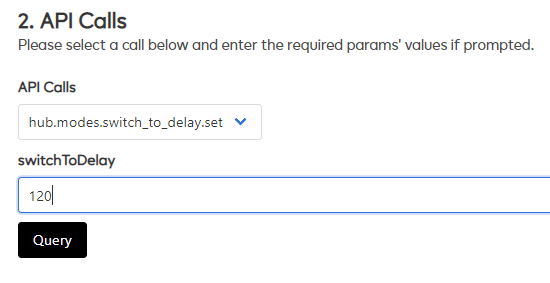
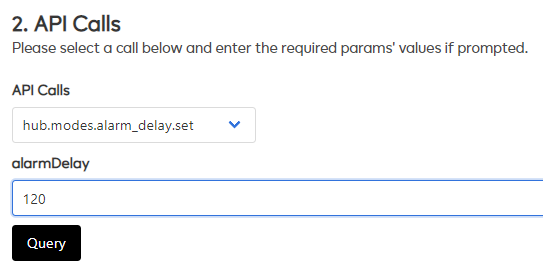
How to increase the “hub.modes.alarm_delay.set” and “hub.modes.switch_to_delay.set”
These are not HTTPS commands however we can use the API Tool to set these delays in seconds, the default is 30 seconds. I have set both of these to 120 seconds.
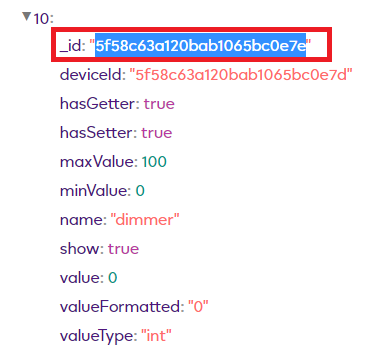
5. Control Roller Shutter / Window Covering.
A Roller Shutter devices “dimmer” value 0 to 100 can be controlled.
In the API Tool first use the “hub.devices.list” query to find the _id number of the Roller Shutter device.
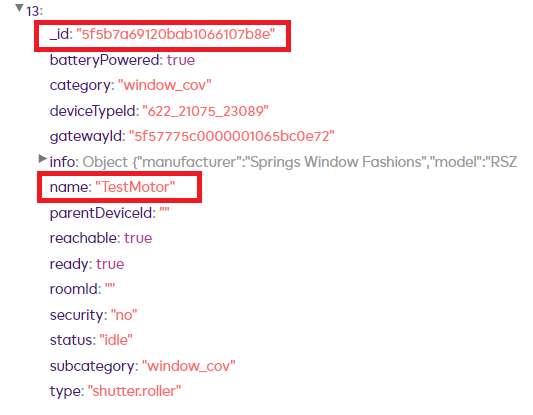
Next use the “hub.items.list” query to find the correct device item object for this Roller Shutter device.
There are several device item objects for a Roller Shutter device, the one we want to use is the “dimmer” item.
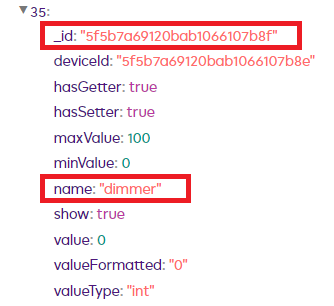
Example HTTPS command to set a Roller Shutter to 50% with no Auth.
https://192.168.0.11:17000/v1/method/hub.item.value.set?_id=5f5b7a69120bab1066107b8f&value_int=50
6. Controlling a Thermostat’s Set Point value.
In the API Tool first use the “hub.devices.list” query to find the _id number of the Thermostat device.
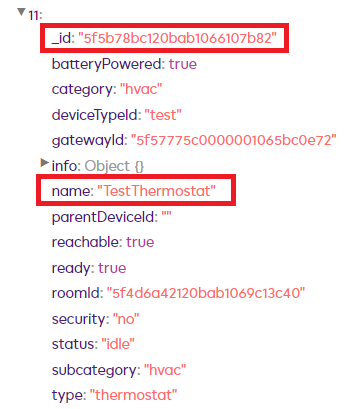
Next use the “hub.items.list” query to find the correct device item object for this Thermostat device.
The device item object we want to use is “thermostat_setpoint”.
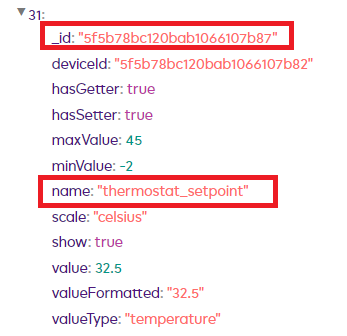
Example HTTPS command with no Auth to set the Thermostat set point to 23 degress.
https://192.168.0.11:17000/v1/method/hub.item.value.set?_id=5f5b78bc120bab1066107b87&value_int=23
Example HTTPS command with no Auth to set the Thermostat set point to 10 degress.
https://192.168.0.11:17000/v1/method/hub.item.value.set?_id=5f5b78bc120bab1066107b87&value_int=10
There are also some other device item objects for a thermostat device such as:
thermostat_setpoint_heating
thermostat_setpoint_cooling
However when I tried to send values to these items it did not work and those set points did not change, even though I received no error in Postman.
There is also a thermostat item named “thermostat_mode” with these possible modes by the looks of it. However I don’t currently know the correct commands to use for setting these modes?
0: “off”
1: “heat”
2: “cool”
3: “auto”
4: “aux”
5: “resume”
6: “fan_only”
7: “furnace”
8: “dry_air”
9: “moist_air”
10: “auto_change_over”
11: “saving_heat”
12: “saving_cool”
13: “away_heat”
14: “away_cool”
15: “full_power”
16: “special”
17: “eco”
18: “emergency_heating”
19: “precooling”
20: “sleep”