Ummm. Long time copier and adjuster of smart developers code. ![]() So fairly low.
So fairly low.
1 Like
Good enough!
Download the ZIP file attachment here, unzip it. In the Vera UI, go to Apps > Develop apps > Luup files. Turn OFF the “Reload” checkbox, then drag the unzipped JSON file to the “Upload” area and drop it there to upload it to your Vera.
Then, go into the device control panel for one of your devices that uses watts as the unit of measurement, and go to the Advanced > Params tab. There, find device_json and change it to D_GenericSensor1_Watts.json. Then go to Advanced > New service and hit the Reload Engine button. Then, hard-refresh your browser.
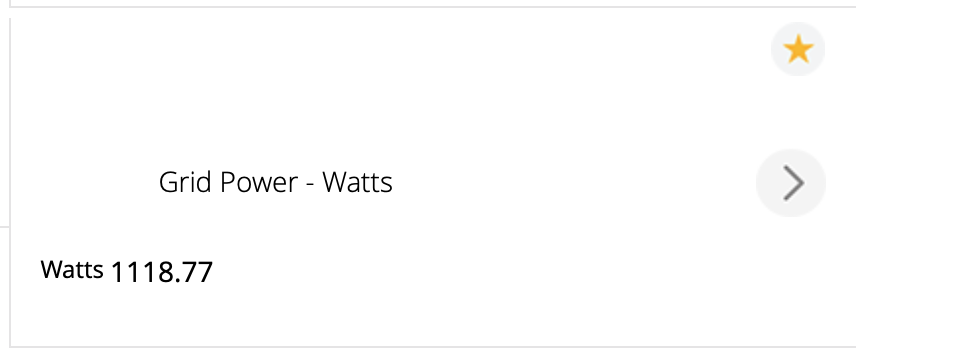
That should make that device display “Watts” instead of “Level”.
D_GenericSensor1_Watts.zip (1.2 KB)
Edit: Corrected case of filename–should be Watts with a capital W as zipped.
Thanks Patrick, I understood all of that OK.
The device I tested with is now not showing at all. It still shows as a virtual sensor (with Device ID #543) but is now missing from the Vera devices page - after a few reloads and browser hard refreshes and a restart.
I did just notice the file name was D_GenericSensor1_Watts.json but I pasted D_GenericSensor1_watts.json from your post. (Lower case watts) Could that be it? Do I fix #543 or create a new virtual sensor?
Edit: Fixed it. Just renamed the .json file to lowercase watts and uploaded again.
It displays perfectly in the iOS app but on a browser it prefixes the label. Is that expected?
What changes do I need to make to create a kWh version of this .json file?
Thanks again - and Merry Christmas.
Web
App

1 Like
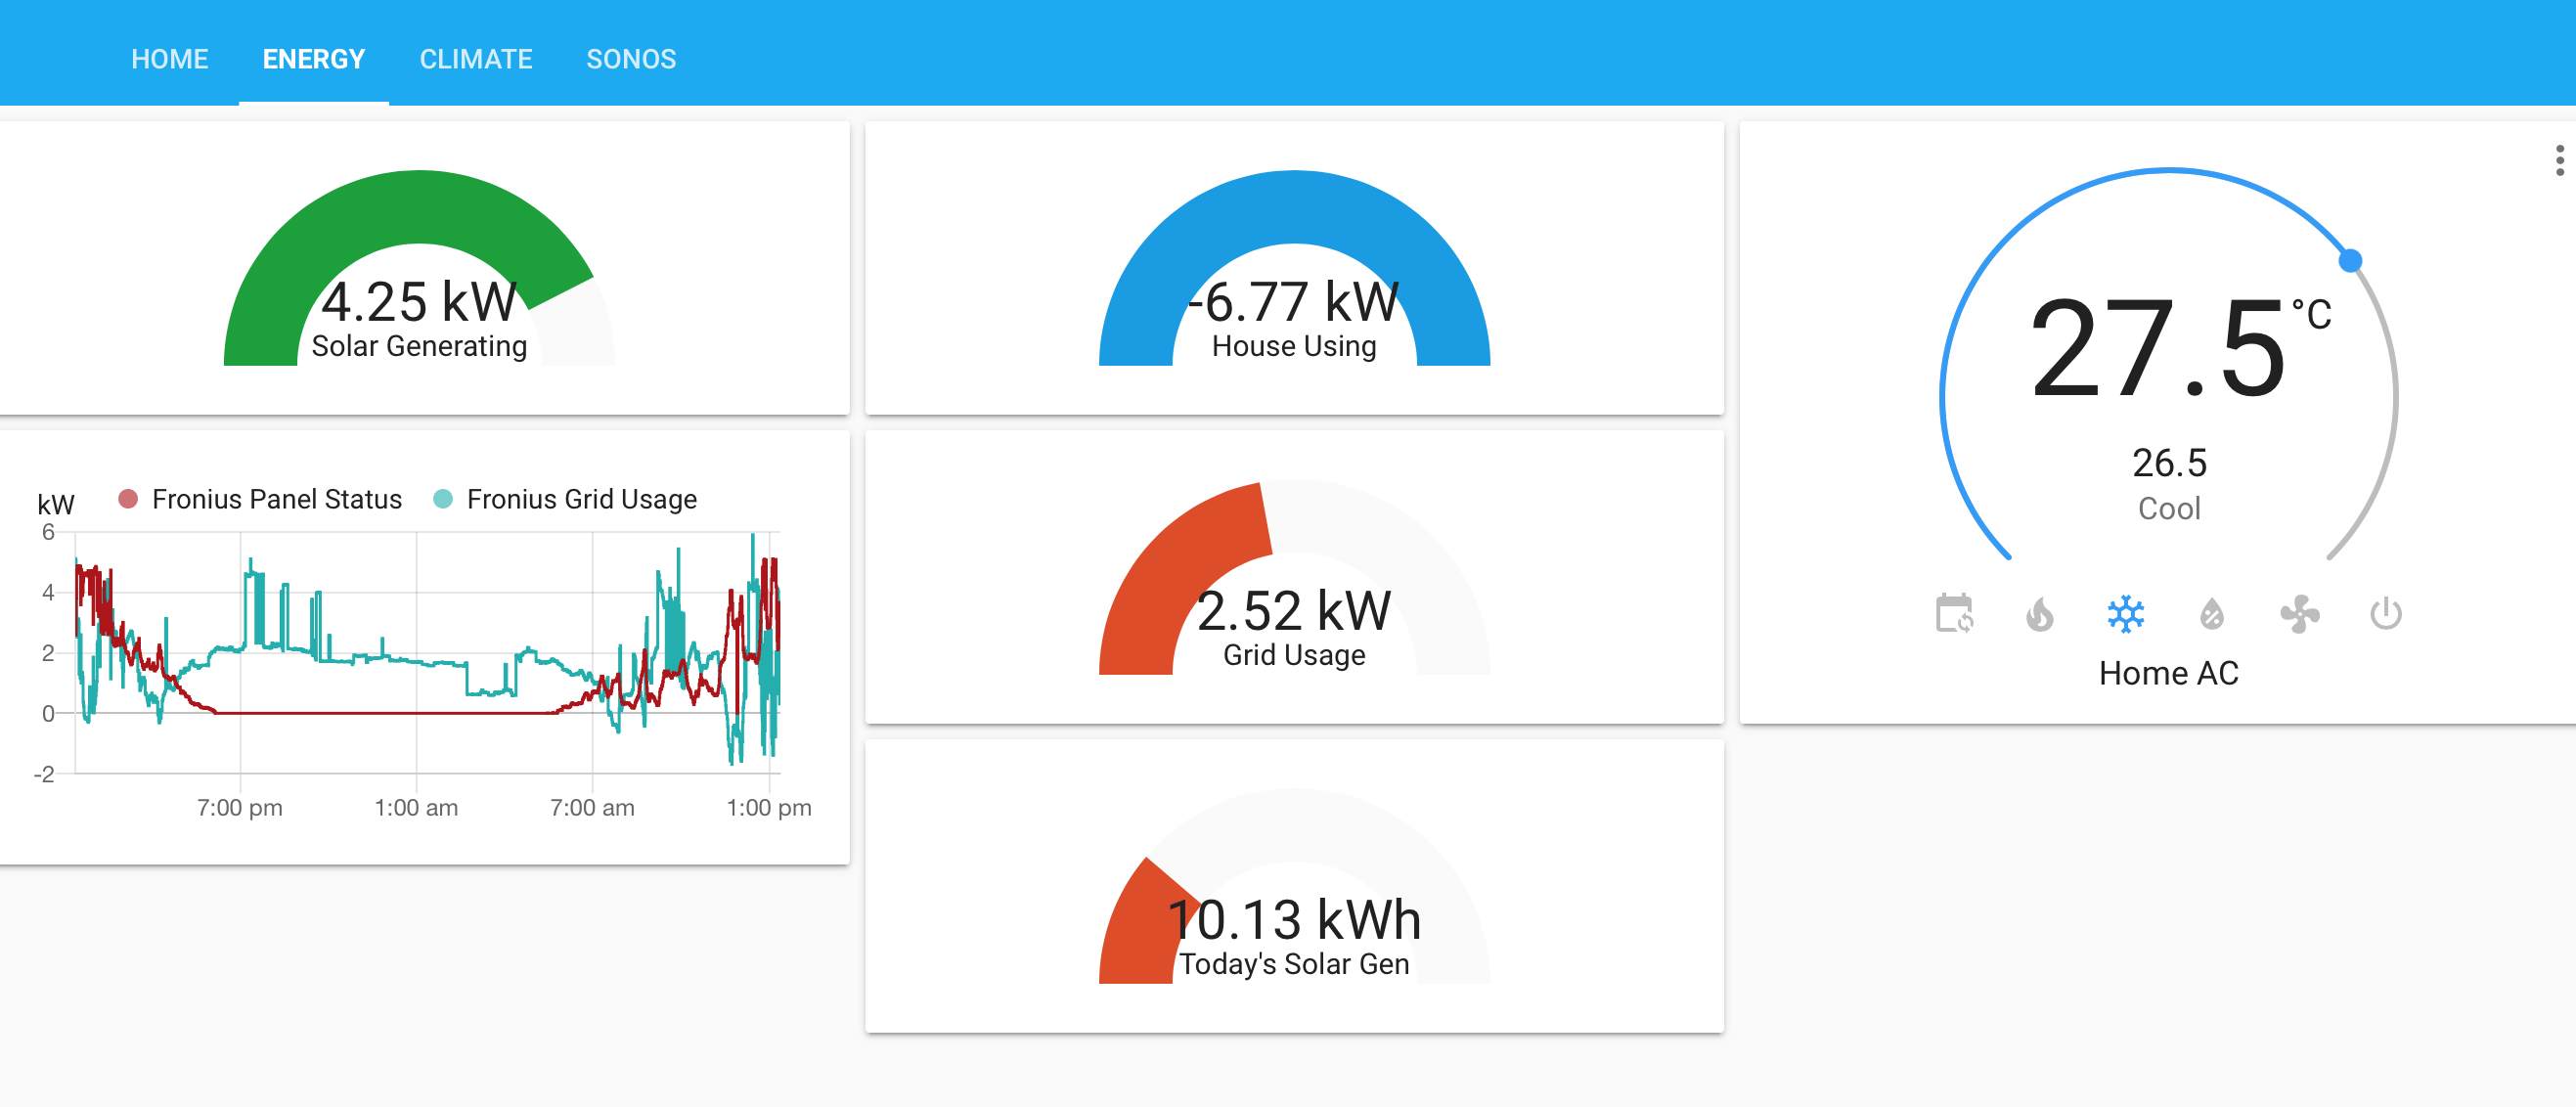
PS - Does Vera support anything more graphical for viewing values like this (from my ‘Home Assistant’)?
Good job! You just leveled up, I’d say! Yes, that was my mistake, sorry. I’ll fix my instructions in the prior post in case anyone else finds them and tries. Thank you!
There are some graphing tools for Vera data, but this is not my area of expertise at all.
I am using Grafana with InfluxDB. There is an excellent plugin for it: VeraFlux
Works pretty good and is easy to set up.
1 Like
Out of the box not. But since it is programmable, it is possible. I experimented with simple plugin which creates svg graphics for device display. Here is one example:
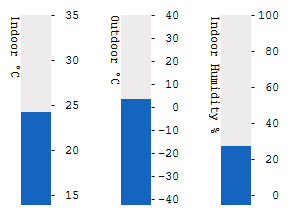
Creating round gauges and even short graphs can be done as well. Downside is that it is kind of hack for UI, if something changes on Veras side then plugin needs to be updated as well.
1 Like
Good afternoon. Can I create a temperature sensor with this plugin and add or subtract a value?
You can create a virtual temperature sensor and have VirtualSensor pull a value from any other state variable on any other device, but it will copy the value only, there’s no translation or arithmetic supported.
An alternative would be to use Reactor expressions, Lua, etc. to compute the value, and then write that value to the virtual sensor.
Thank you very much for your prompt response.
My problem is that I have a philio temperature and humidity device that is giving me the wrong values. the device has no parameter to perform the calibration. Do you know what would be the best solution to solve this?
Hello, I’m a beginner in home automation, and I want to upgrade my basic Vera system with new Tasmota based devices.
I have discovered your Virtual sensors plugin, that I think it match very well what I need to receive information from my binary sensors made with Tasmota an ESP8266. I have installed the plugin from the Vera store, and I can see it at the Devices section of the Vera UI. However, when I try to define a virtual sensor clicking on ‘Create new virtual sensor’ after choosing its type, I obtain the message ‘This site says: There was an error loading configuration data. Vera may be busy; try again in a moment’. I have tried it several times, and I obtain always the same response.
The virtual sensor seems to be created anyway, but I cannot make it work…
Am I doing something wrong?
Thank you very much.
Have you tried hard refreshing your browser?
I’ve tried with different browsers and instances. No differencies…
Trying different things I have discovered that the virtual sensor works fine if I link it with an existing (physical) device, even if I received the ‘loading configuration data’ error.
But, if I leave it in the (no device/no copy) state, then I cannot trip it via HTTP command, which is the option I’m interested in.
I have created an alias (AAV) in the ‘variables’ section of the child device, and when I try to trip it with a HTTP order, I receive from Vera the answer ‘Done with “trip” for 0 devices matching alias “AAV”’.
This it the HTTP command I’m sending: http://192.168.1.133/port_3480/data_request?id=lr_VirtualSensor&action=trip&alias=AAV
I don’t know what more can I do…
http://[add_ip_address]:3480/data_request?id=variableset&DeviceNum=[add_correct_device_id]&serviceId=[add_correct_servceId]&Variable=AAVs&Value=1
Edit areas [ ]
What type of sensor did you create?
Thanks for your quick reply. Where can I find the serviceId?
Thanks for your quick reply. I used the ‘Motion/security binary’ type of sensor.
The Alias mechanism does not work on child devices. It is an old facility that predates child devices as a feature. I should have removed it from the documentation. Use the following instead. You’ll need to know the device number of the child virtual device:
To trip:
http://local-ip-address/port_3480/data_request?id=variableset&DeviceNum=nnn&serviceId=urn:micasaverde-com:serviceId:SecuritySensor1&Variable=Tripped&Value=1
To reset:
http://local-ip-address/port_3480/data_request?id=variableset&DeviceNum=nnn&serviceId=urn:micasaverde-com:serviceId:SecuritySensor1&Variable=Tripped&Value=0
Yes! It works now!
I’ll try now to put the HTTP command in Tasmota.
Thanks a lot!!
1 Like
To find the serviceId go to the device-advanced-variables
and hover over variable or click edit.