I don’t think for the door sensor a child device was created. This information is probably for another aquaria device. The parent #2 is your Vera device.
Did the device configure successful? So Configured = 1 (in the device → advanced → variables tab)? and was Status attribute created?
Hi, would be possible to make it more understandable also for Vera n00b users
So far I was able to pair humdity sensor to work ok.
Battery info would be really welcome to see somewhere.
Thanks in advance for any possible step by step guide.
I am of the same opinion.
For a beginner it is very difficult to implement.
I would also like to use Xiaomi sensors with Vera but I don’t know where to start.
yes, it took me a while to get it implemented correctly. It is very difficult since there is not official support for it but the first step is to get the device paired with the hub once paired thatn you work on manual configuration.
I can get the door sensor to add and it shows as genericIO, it switches from on to off when magnet removed or added.
The temp and humidity sensor i am having difficulty with.
Have added child but nothing is reporting.
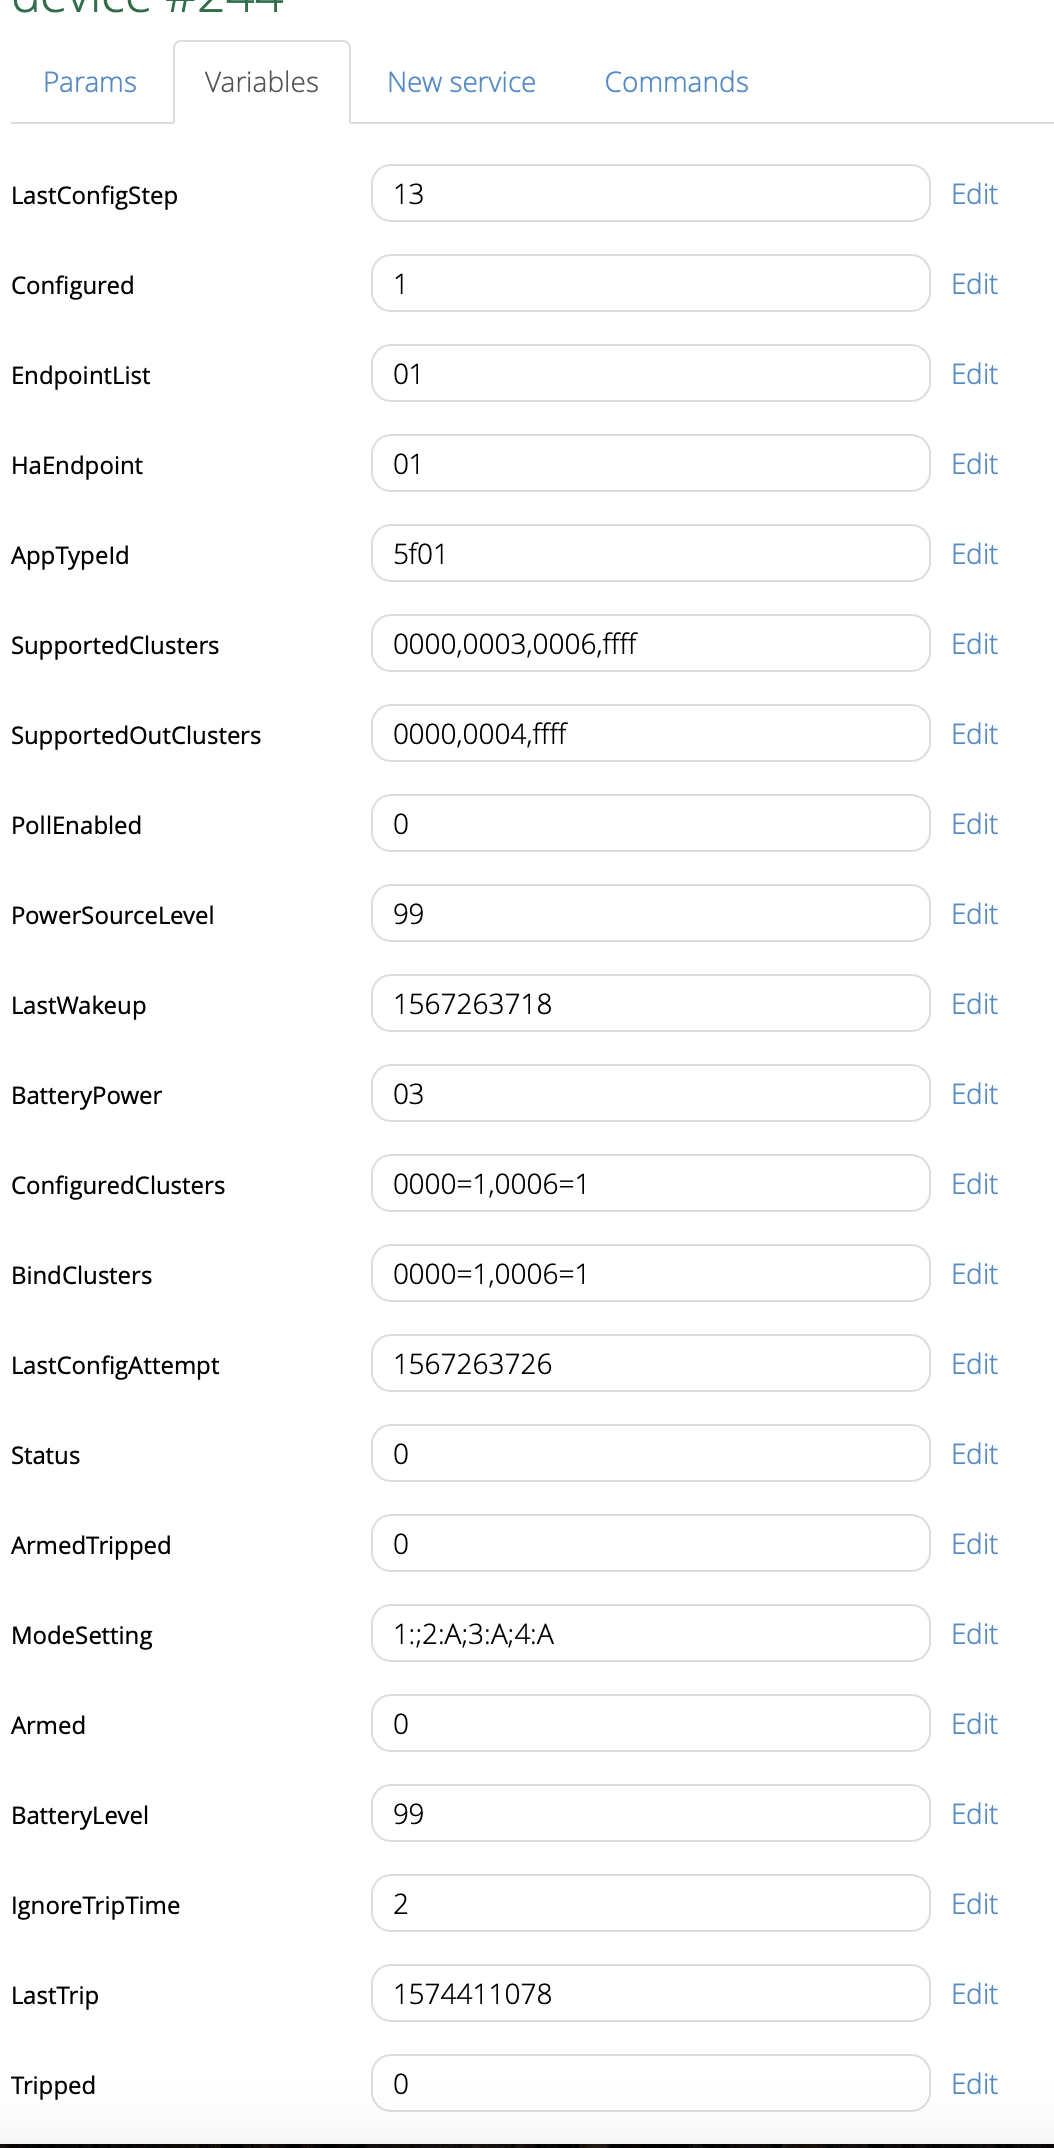
Could someone post an image of the attributes and variable pages of a working configured sensor, as i think i may be missing some cluster variables. Cheers
I have currently 5 Temp sensors (the square ones, not the round ones). They are all working fine.
What, i think, helped is to keep single-pressing the button on the sensor every 1-2 seconds once the inclusion successfully starts (Vera detected the sensor) during the whole process up until the luup engine has restarted. I’ve read this tip somewhere, it seems the sensor goes to sleep too fast and won’t continue to configuration. By clicking the button it wakes up/keeps awake.
The sensor will automatically create the child devices. This seems like a better solution than manually adding the child devices.
Cheers for that. Seems that the round sensor will show variables of temp and humidity in variables but will not add child, either manually or by its self. I have had the round one for a year and a half so it was worth a try. I can still access the vars so half working.
I have tried editing therealdb code to update the Tripped var in the door sensor but with no luck.
Nice, that works as well. Im not familiar with “therealdb code”, whats that?
If you change the Param ‘ device_type’ to urn:schemas-micasaverde-com:device:DoorSensor:1
And the Param ‘device_file’ to D_DoorSensor1.xml
And the Param ‘device-json’ to D_DoorSensor1.json
The device will then show up as a door sensor instead of a generic device. Then you can arm the sensor and also use it in regular scenes for triggering when the Status changes.
I have already updated the D_DoorSensor1 elements, and have the correct icon and armed updating.
The issue i have is i need to add a tripped variable and update it with the status var. This is so the sensor trips when armed can be used. I asked you as you mentioned a listener in post 43 above.
function updateSecurityStatus(dev_id, service, variable, oldValue, newValue)
    if tonumber(oldValue) ~= tonumber(newValue) then
        luup.variable_set( "urn:micasaverde-com:serviceId:SecuritySensor1", "Tripped", newValue, dev_id)
    end
end
luup.variable_watch("updateSecurityStatus",  "urn:upnp-org:serviceId:SwitchPower1", "Status", <your_device_id>)
I’ve just tried to get this working and get battery status showing up, but I couldn’t get it working using this method, I’m probably doing something wrong.
I have however got it working my own way as follows.
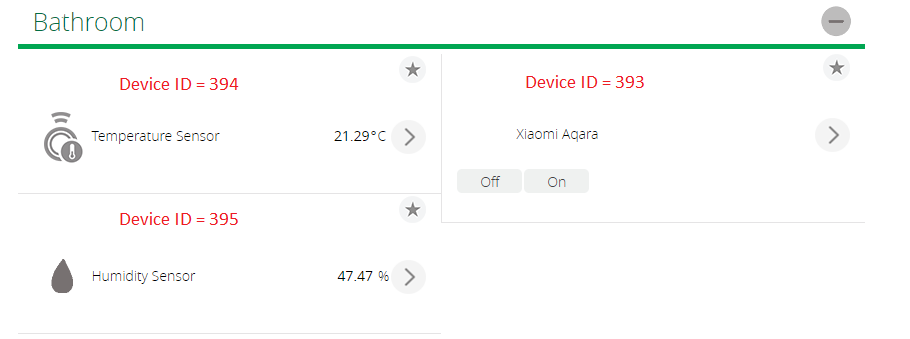
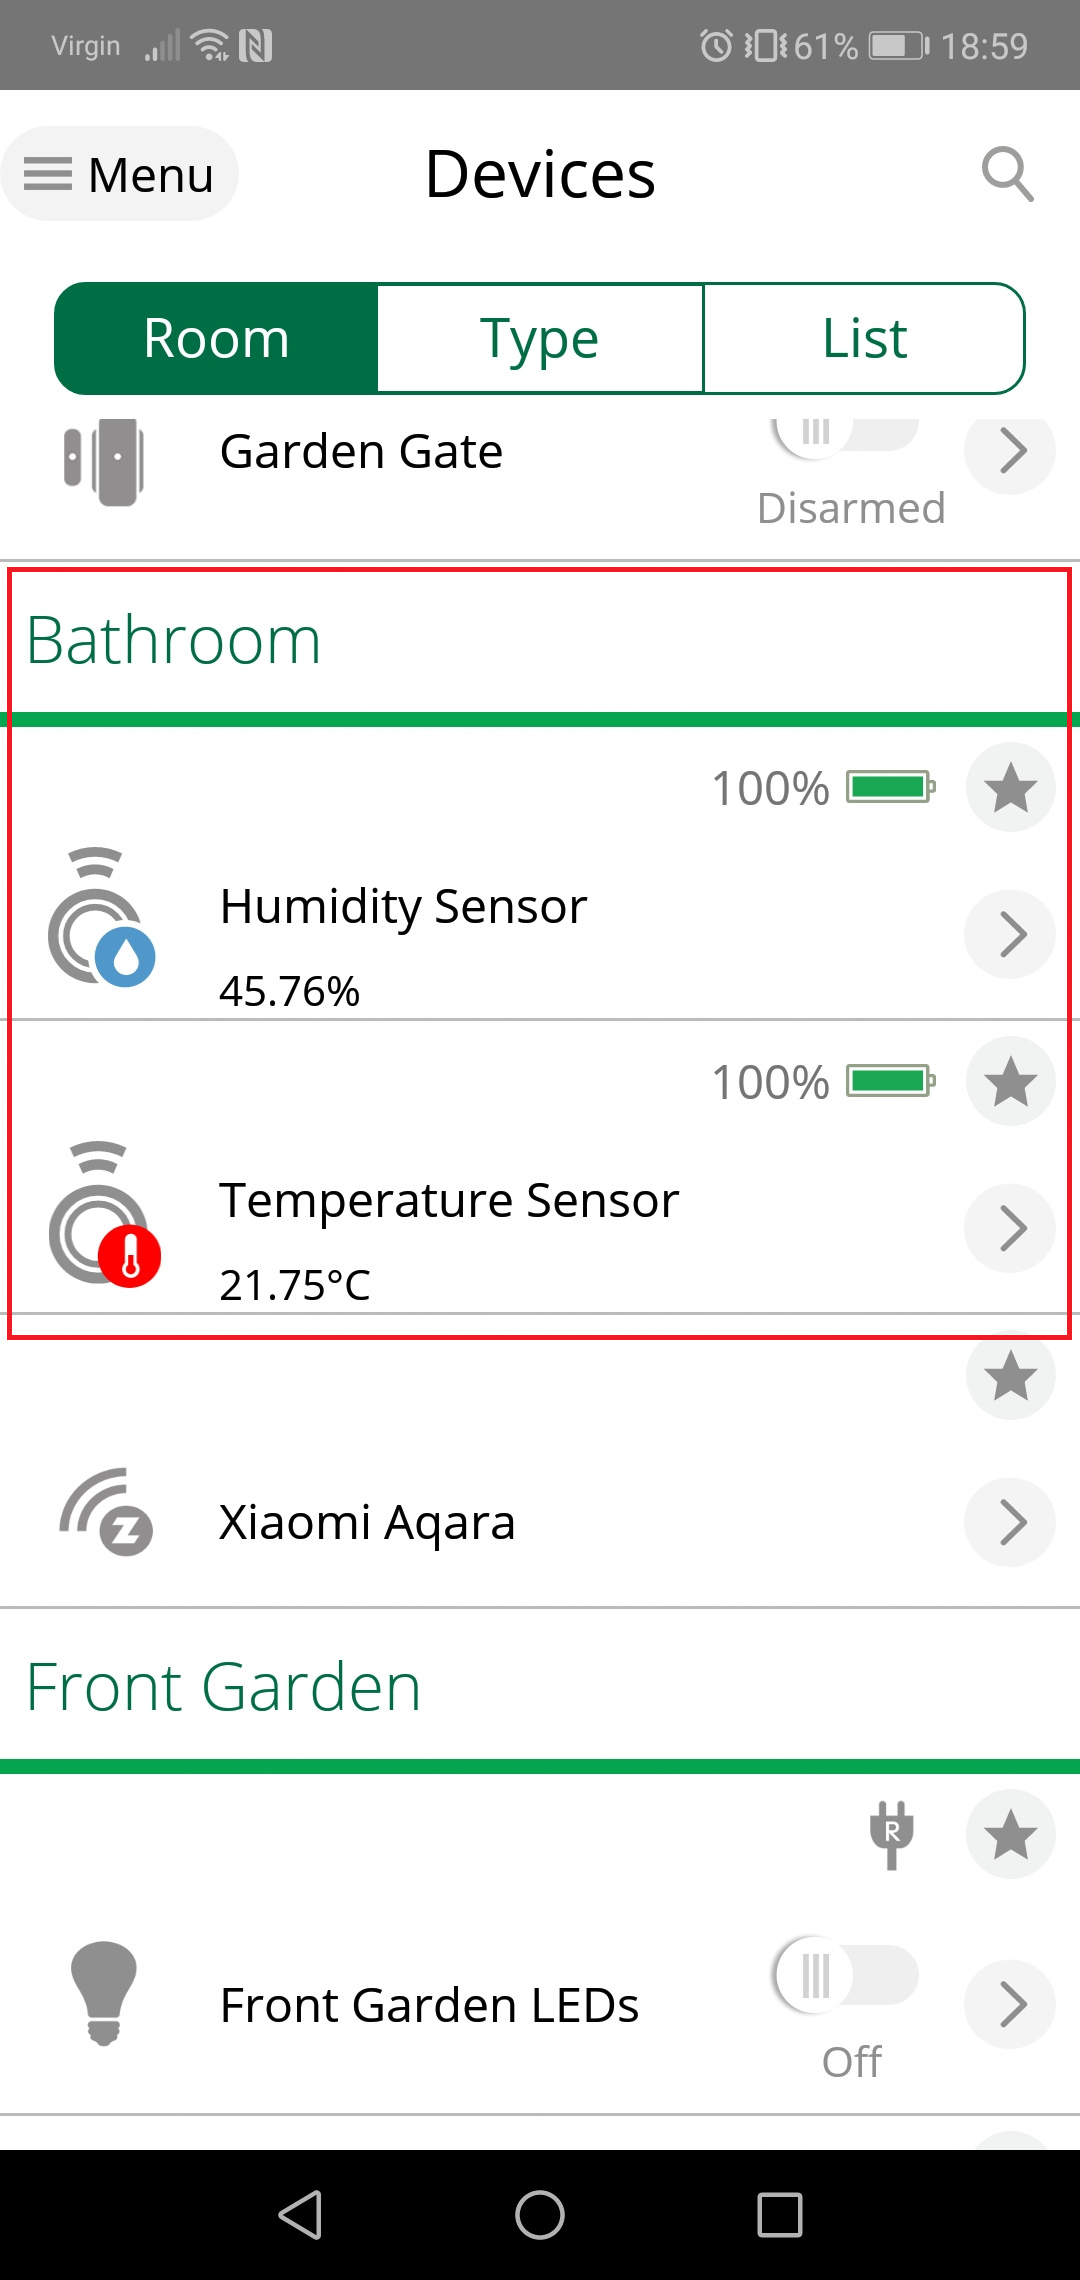
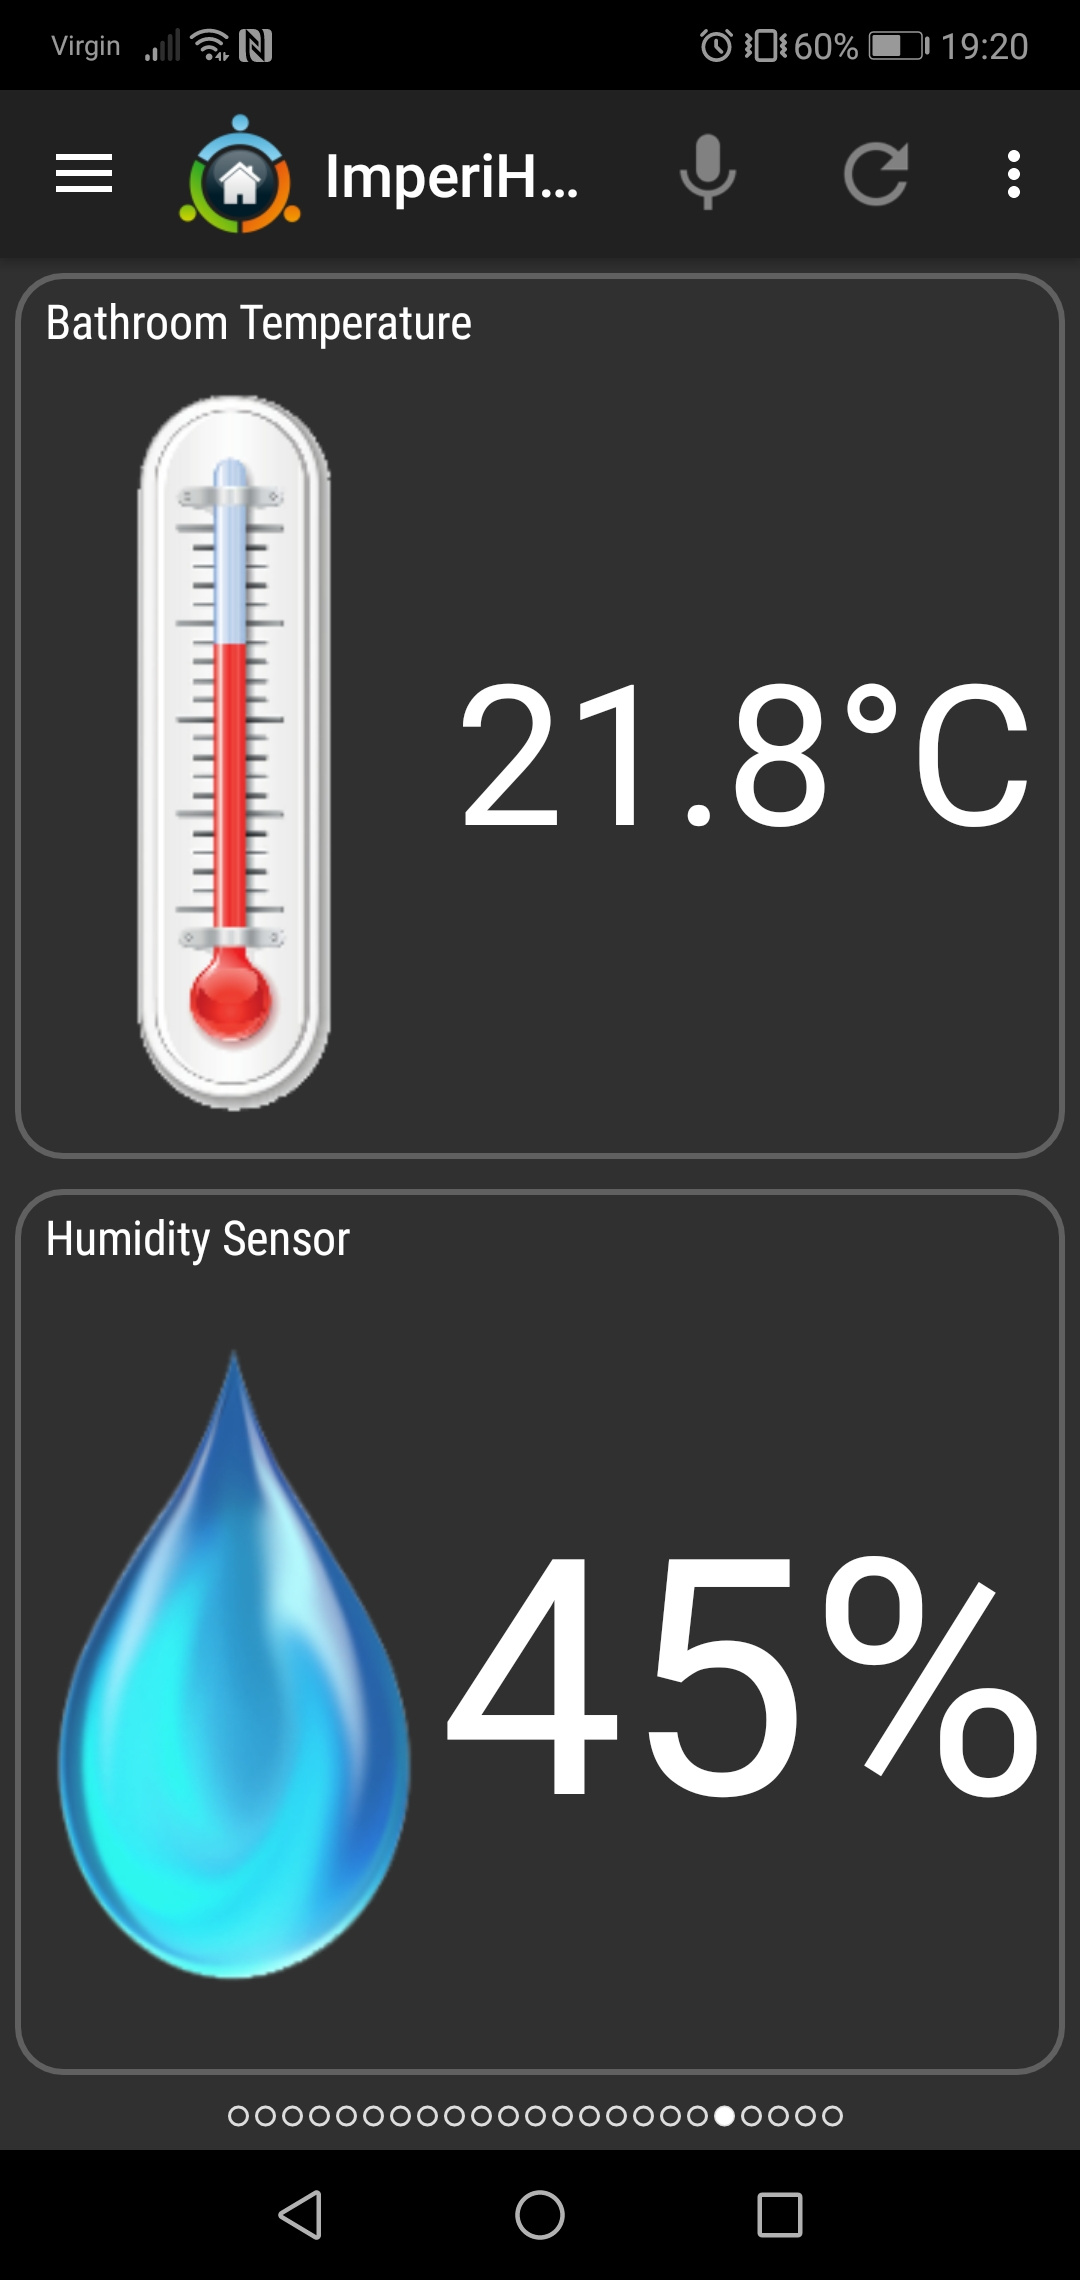
I have the Xiaomi Aqura Temp and Humidity sensor the square one.
This when added to Vera created a “parent device” a Generic I/O device and two child devices one for the Temp sensor and one for the Humidity sensor etc.
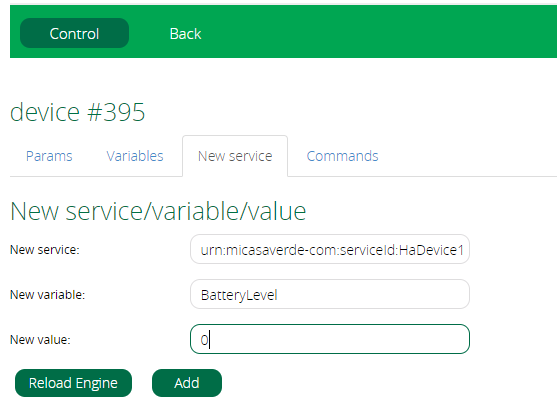
Add a new “BatteryLevel” Variable to each of the child devices.
To do this go to the device then “Advanced” and select the “New Service” tab
Enter the following values and then press the Add button and then the Reload Engine button.
New Service: urn:micasaverde-com:serviceId:HaDevice1
New Variable: BatteryLevel
New Value: 0
Repeat this step on any other child devices, so I did this on both the Temp and Humidity sensor child devices.
Create a Vera Scene or PLEG action or whatever to run this LUA code every day or hour or however often you want the battery information to be updated and populated on the child devices from the parent device.
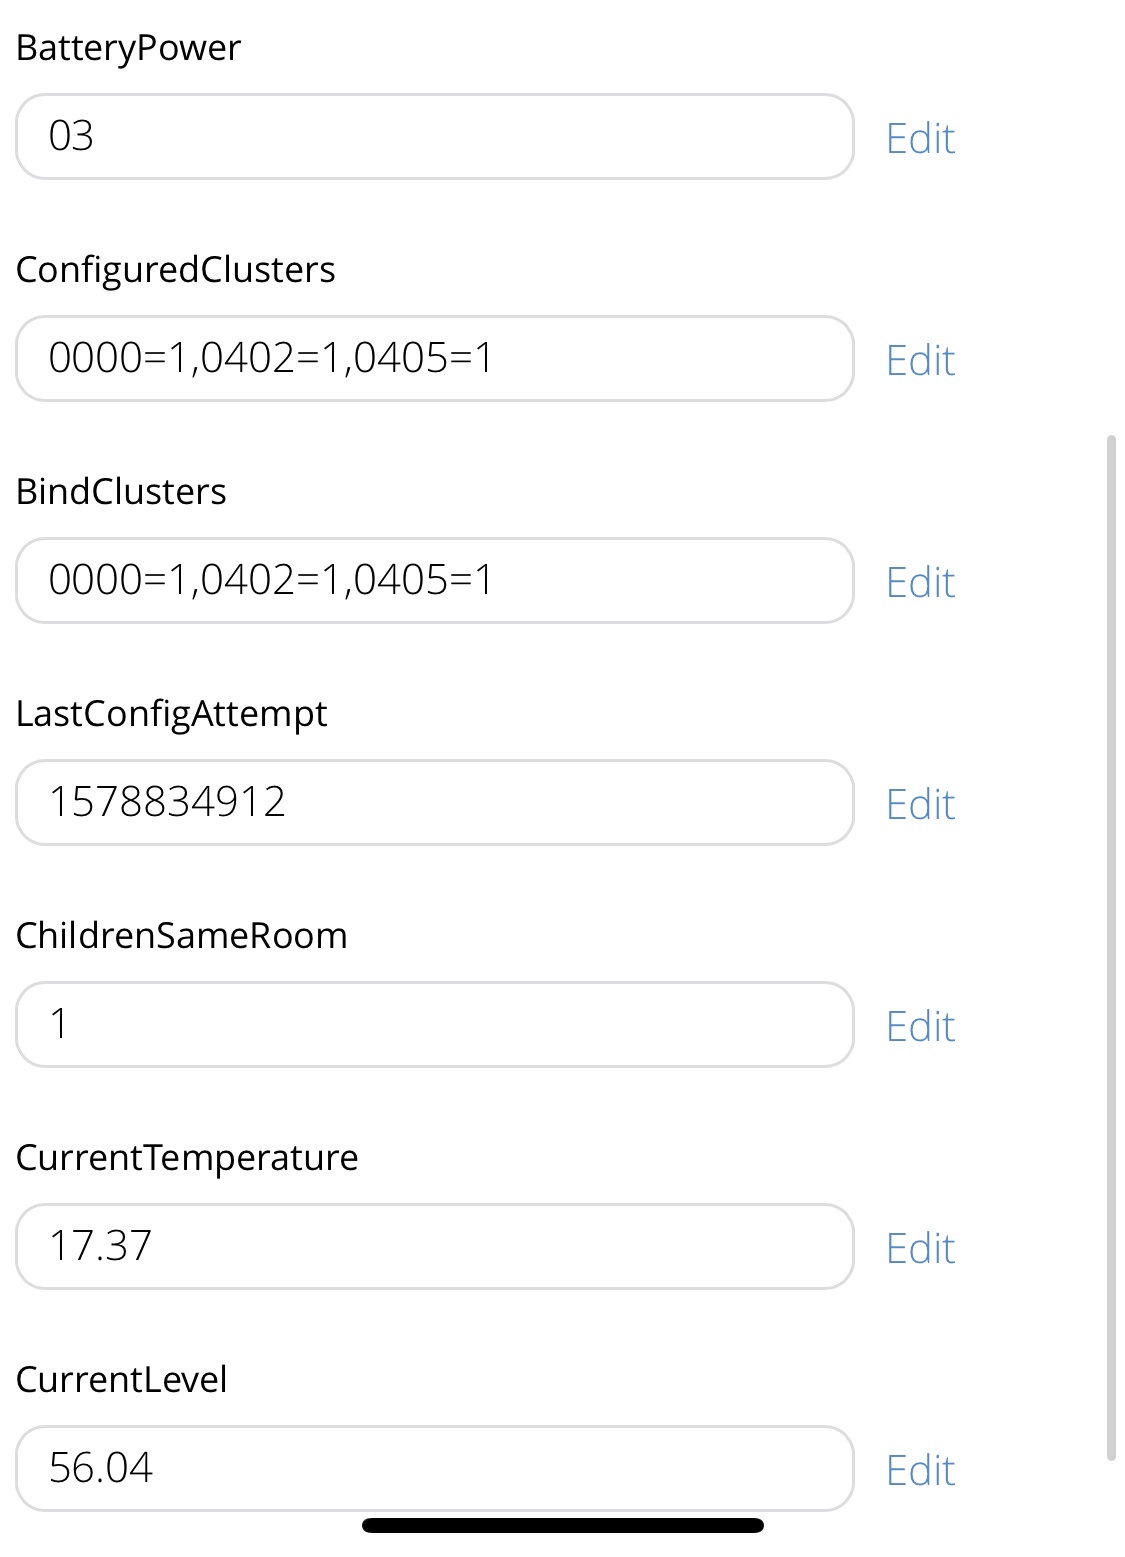
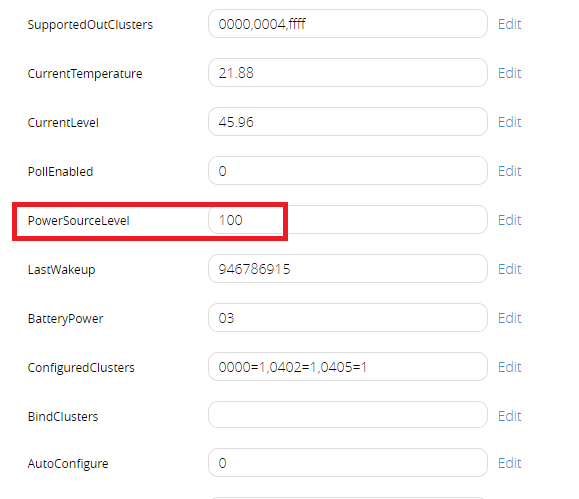
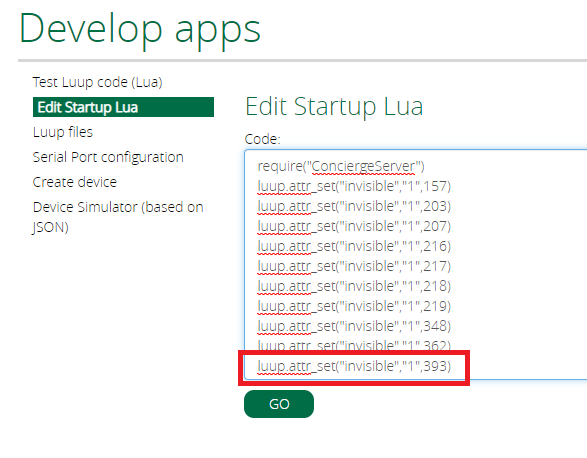
local updateBatteryInfo = luup.variable_get(“urn:micasaverde-com:serviceId:ZigbeeDevice1”, “PowerSourceLevel”, 393)
Line 1 gets the current battery level from the parent / master device, from the “PowerSourceLevel” variable.
Lines 2 and 3 then set that battery level value on the two child devices into the new “BatteryLevel” variable.
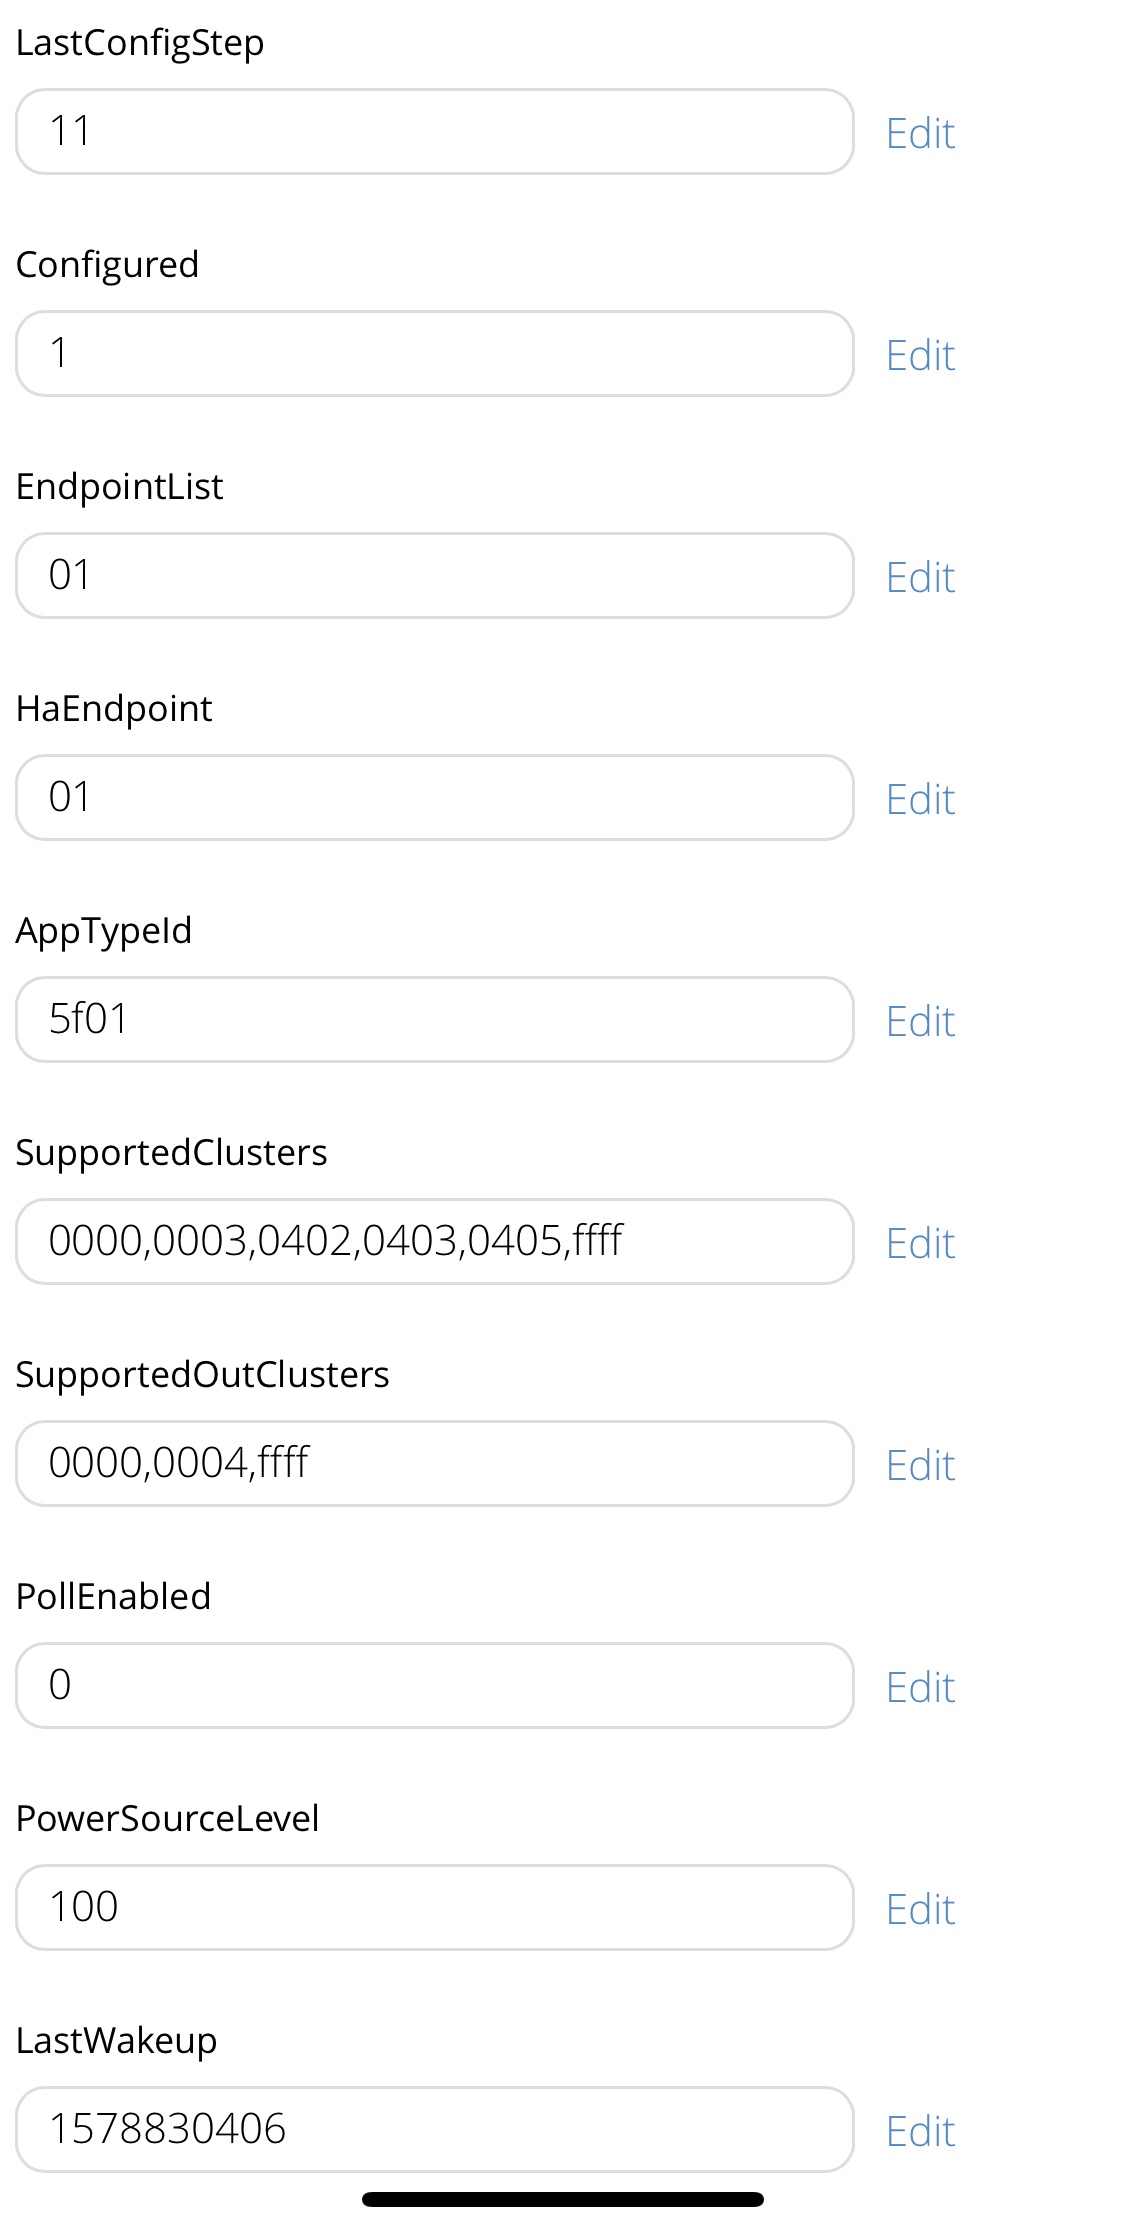
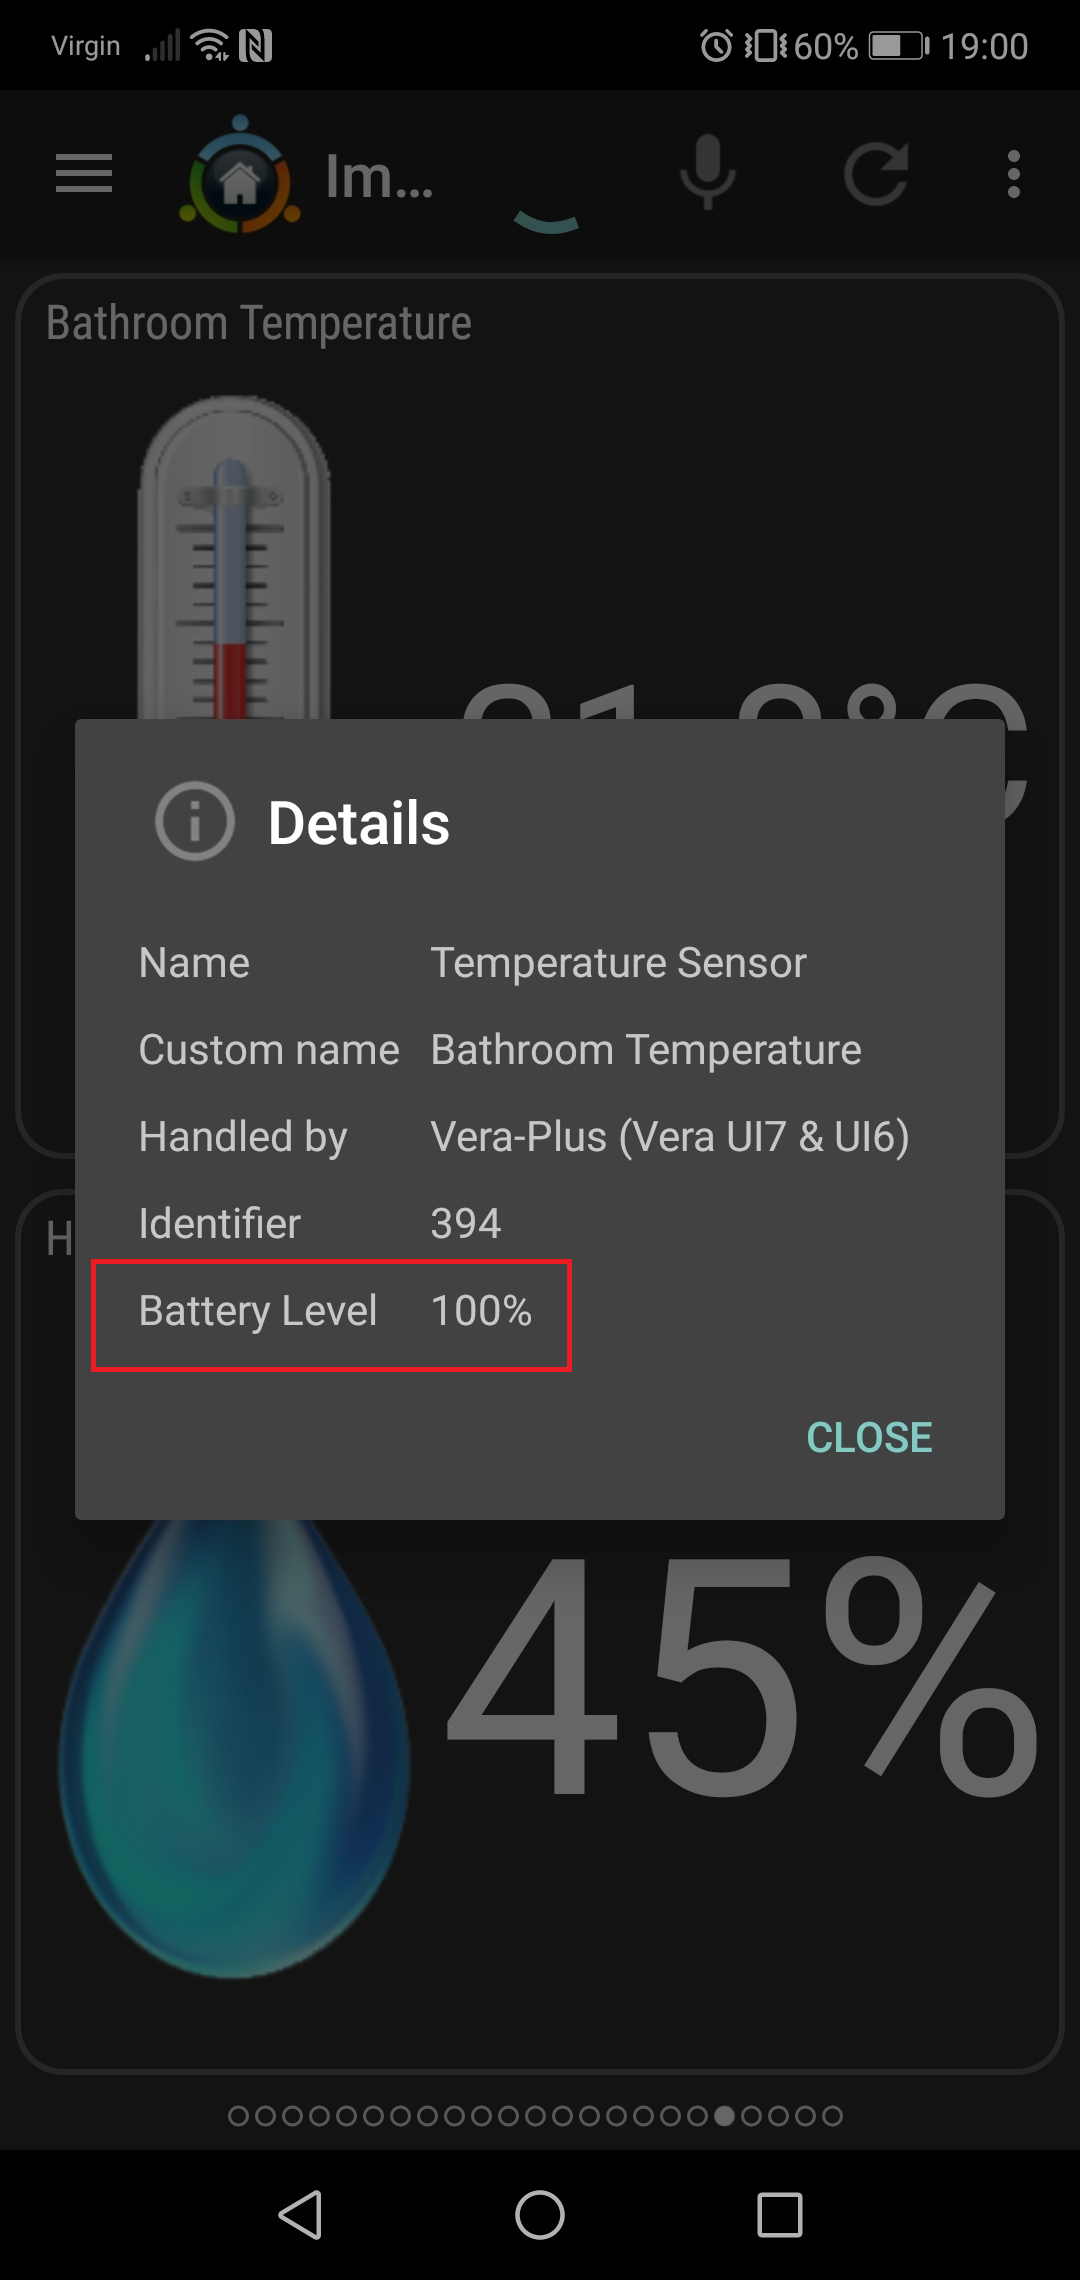
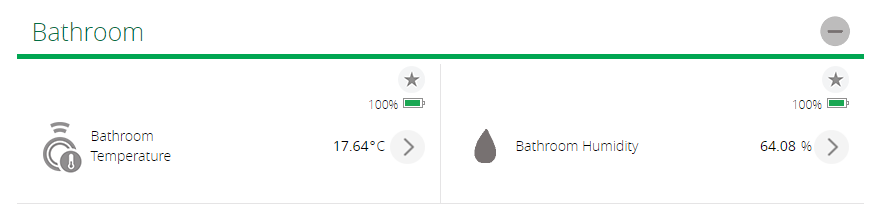
Here you can see on my parent device looking in the variables tab that the “PowerSourceLevel” is currently at 100 %
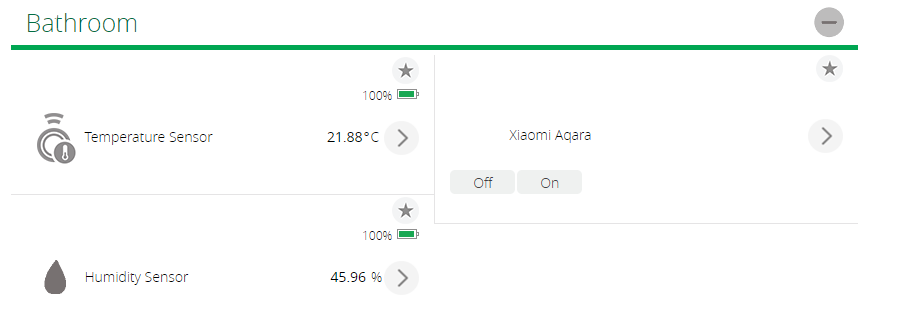
After running my code in the Vera settings - Apps - Develop Apps - Test Lua Code area both of the child devices changed their battery status from 0 % to 100 %
thats a good way to do a battery update eithe pledge or reactor, never thought of that. instead of hiding my main gneric IO - just converted it to one of the devices and deleted one of the children. it seems with all zigbee devices since the stack ist complete it creates a endpoint (GenericIO) for the cluster 0000 during config. but on that Generic IO if you change the device type to one of the endpoints i.e D_TemperatureSensor1.xml D_TemperatureSensor1.json it changes the main endpoint to a temp sesor since all the variables are already there and u can disassociate the child from the main endpoint that way u do not have a bunch of Generic IO hidden device. That is totally up to you though
the battery level in the imperihome app could be something with the way the device file was coded
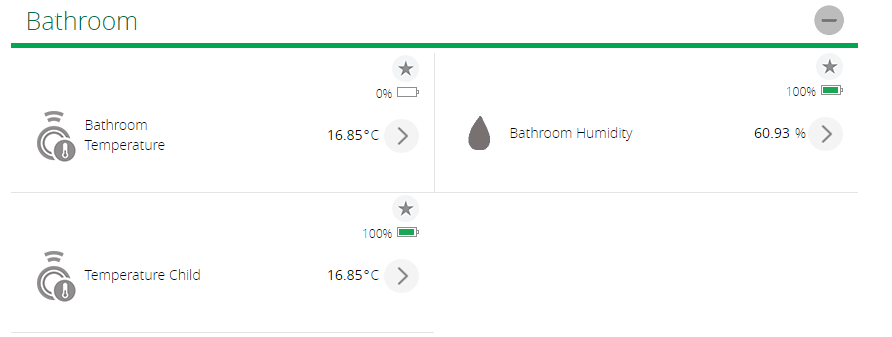
I also added a new BatteryLevel variable to the parent device and updated my Lua code to reflect these changes and I have now deleted the child device temp sensor.
I then removed the child temp sensor widget from the Imperihome app and instead added the parent device / temp sensor in to Imperihome app. However its still not showing a battery icon on the device in Imperihome. I am really not sure why that is.
Oh well least I have gotten rid of one device from the Vera UI7 interface.
Note: I did really struggle to delete the child temp sensor device it would not delete at all.
In the end I think what did it, was I had to uncheck “Embedded” in its Advanced → Params and then ran this in the browser to delete it and its now finally gone.
394 being the device number of the device you want to delete.
The parent device now has both “PowerSourceLevel” and “BatteryLevel” variables, the LUA code updates the “BatteryLevel” value from the value of “PowerSourceLevel”
no i didnt know what handler / device file to use so i had to get a z-wave first and see how it works but there is still no implementation of a pressure sensor or a tilt sensor for zwave as yet. I thus put that in the parking lot for now. I’m currently working on some older zigbee sensors on my test unit to see if i can get some stuff reporting
Sounds good but I am in the UK and that sensor is not available for EU frequency I don’t think. That Vision one I mentioned was the only one I could find.